
D.va Neck & Shoulder Armor Write Up


D.va Neck & Shoulder Armor Write Up
I promised a friend awhile ago that I’d do a little write up for how I made my armor for my D.va cosplay and totally forgot about it - WHOOPS.

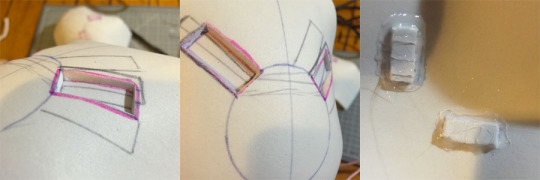
For the neck armor I used WindOfTheStars’ D.va armor pattern with a few modifications. The few things I modified was the length and shape of some of the pieces so it would work with how the pieces on my suit were laid out. The front tip of D.va’s armor ends just before the rabbit logo so I added a few inches so it would reach there while I had my suit on. I used 6mm foam for the neck piece.
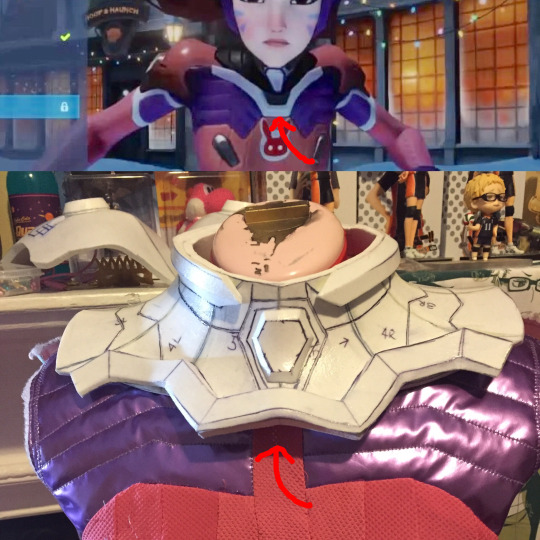
(It doesn’t look like it ends where it’s suppose to but it does while I was wearing the suit, I swear!)
I also used a different technique for the top silver trim. I measured how long I needed them to be and instead of cutting a straight line I cut it with my beveled foam cutter then cut the same strip again with the beveled cutter so it would have the right shape. It also helps to use a metal ruler to guide where you’re cutting to save you a lot of headache.
The bottom trim is done almost the same way as the top trip. I measured out the shape, drew it out and used the bevel cutter ONLY on the part facing out. The side facing in (towards the neck) was cut straight. After I cut it with the bevel cutter, it didn’t look quite right to me so I marked a line along the beveled part and cut very carefully until the depth looked right. I used 8mm craft foam for this piece
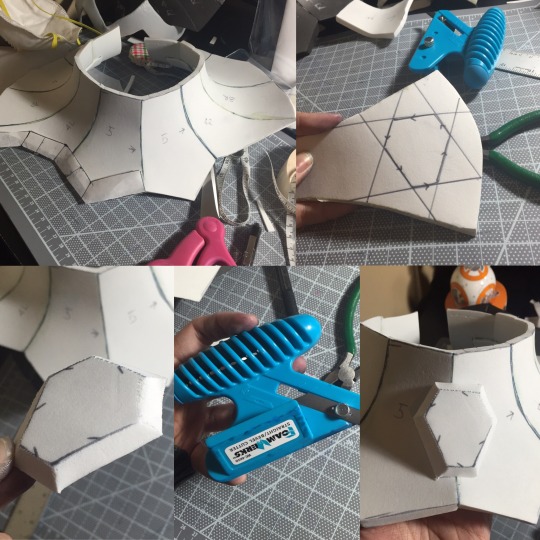
For the gem part thing at the front of her neck piece I also used my bevel cutter - I marked the direction I wanted to cut because BOY did I mess it up a bunch of times. Also forgot to mention earlier - the blades that come with the bevel cutter dull out super quick so I bought a pack of them on Amazon.
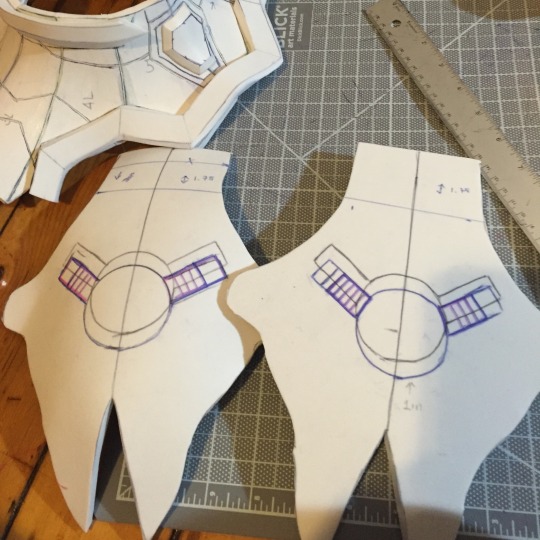
For the shoulder pieces, I patterned them out on my own. Like the neck piece, I patterned them out to work with my bodysuit pattern. The shoulder pieces end just before the strappy things on her sleeves In my case, it was about 6in from my shoulder to the strappy piece. This was the general shape:
Optional - I thought the shoulder pieces lacked depth so I used a technique I learned from Punished Props. I carefully cut out a piece, pushed it in, and hot glued it in place.
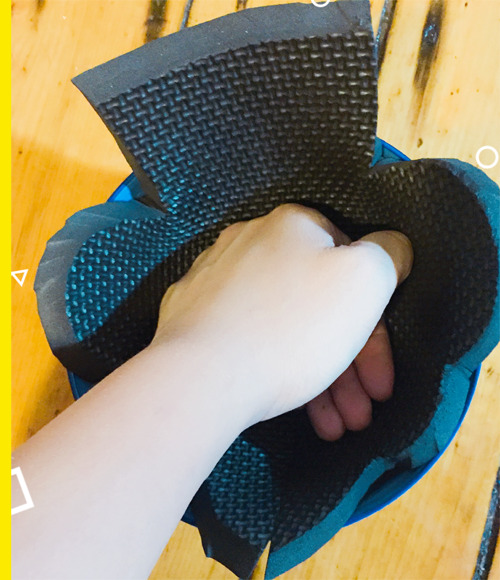
Another technique I learned from Bill was using a bowl to get a nice curved shape - I just happened to luck out and have a bowl that had the exact curve size I wanted and used that. I used 8mm craft foam for the shoulder pieces.
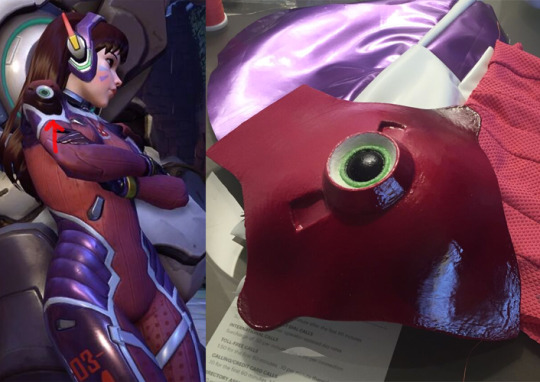
Aaaand lastly, I glued the plugs I got from @dangerous-ladies on top of the shoulder piece last. Since the surface is curved and the bottom of the plug is flat, there’s gaps when it’s glued. I used Kwik Seal Plus to fill the gaps, let it dry overnight, then sanded it.
All the pieces were glued together using contact cement!
As for painting and priming it, there’s a ton of tutorials out there for priming and painting EVA foam. I picked a few that worked best for me based on what I could afford and what I could use in my apartment.
Resources: